09.30 Get started
Table of contents
- Navigate to your code folder
- Navigate to the repos directory
- Navigate to the publisher-website directory
- Process the files
- Start a server running on your computer
- View the code running in a browser
- View the code in your editor
- What you’ve learned
This article explains the first actions you will take on the Day of Code. This is the first article you'll work through on the Day of Code with your coach.
Navigate to your code folder
Open Terminal (Mac) or the Command Prompt (Windows). You should be in your home directory. On Windows it will look something like this:
  (c) 2019 Microsoft Corporation. All rights reserved.
  C:\Users\Emma>
On the Mac it will look something like this:
  Last login: Sat Nov 16 12:34:20 on ttys008
  Emma@Emmas-MBP-3 ~ $
If the Terminal or Command Prompt does not start with your location being your home folder, you’ll need to change directory into it. In that case only, at the command line, type the following and press enter:
On the Mac, type:
cdOn Windows, type:
cd %HOMEPATH%cd stands for “change directory”, and it has changed the directory you’re in to your home directory starting point. You could have done the same by going to your file navigator on your computer (Finder or File Explorer) and clicking on the relevant folder, but you’re doing programming now, so you’ll use the command line, which is quicker and more controllable.
Navigate to the repos directory
Now you need to change into the directory you saved your publisher-website starter kit in. Type the following and press enter:
cd reposYou have changed into the repos directory. Any commands you run on the command line now will be executed in the scope of the repos directory.
Navigate to the publisher-website directory
You have downloaded the code into your repos directory, in a sub-directory called publisher-website. Change into this publisher-website directory by typing the following and pressing enter:
cd publisher-websiteYou are now within the publisher-website directory.
Process the files
You are going to run a command to download the Ruby code libraries (known as “gems”, rather charmingly) listed in the Gemfile that are needed for this project, and make them run on your computer. Type the following and press enter:
bundleYour terminal window looks a bit like this:
  Emma@Emmas-MBP-3 publisher-website $ bundle
  Using public_suffix 4.0.1
  Using addressable 2.7.0
  Using bundler 1.16.6
  Using byebug 10.0.2
  Using colorator 1.1.0
  Using concurrent-ruby 1.1.5
  Using crass 1.0.4
  Using diff-lcs 1.3
  Using eventmachine 1.2.7
  Using http_parser.rb 0.6.0
  Using em-websocket 0.5.1
  Using ffi 1.11.1
  Using forwardable-extended 2.6.0
  Using i18n 1.7.0
  Using sassc 2.2.1
  Using jekyll-sass-converter 2.0.1
  Using rb-fsevent 0.10.3
  Using rb-inotify 0.10.0
  Using listen 3.2.0
  Using jekyll-watch 2.2.1
  Using kramdown 2.1.0
  Using kramdown-parser-gfm 1.1.0
  Using liquid 4.0.3
  Using mercenary 0.3.6
  Using pathutil 0.16.2
  Using rouge 3.11.1
  Using safe_yaml 1.0.5
  Using unicode-display_width 1.6.0
  Using terminal-table 1.8.0
  Using jekyll 4.0.0
  Using mini_portile2 2.4.0
  Using nokogiri 1.10.4
  Using nori 2.6.0
  Using lisbn 0.2.4
  Using nokogumbo 1.5.0
  Using rspec-support 3.8.0
  Using rspec-core 3.8.0
  Using rspec-expectations 3.8.1
  Using rspec-mocks 3.8.0
  Using rspec 3.8.0
  Using sanitize 4.6.6
  Bundle complete! 6 Gemfile dependencies, 41 gems now installed.
  Use `bundle info [gemname]` to see where a bundled gem is installed.
  Emma@Emmas-MBP-3 publisher-website $
Troubleshoot
- If you get a message such as
public_suffix-4.0.1 requires ruby version >= 2.3, which is incompatible with the current version, ruby 2.2.5p319, you are on an old version of Ruby. Ask your coach for advice, and post in the Slack channel for further help. Our advice will differ based on which system and Ruby version manager you’re on. Aim for Ruby 2.5.5 at least.- If you get a Windows error like “this version of Rubyxxx is not compatible with the version of Windows you’re running”, reinstall Bundler by typing
gem install bundler, pressing enter and accepting the dialogue box defaults. You might also have to runbundle update --bundlerif prompted by another error message, andgem install bundler:1.16.6, and MSYS2 if prompted.
Start a server running on your computer
Now you are ready to run the code you have downloaded. You do this by starting a server. Type the following and press enter:
jekyll serveYour terminal window looks a bit like this:
  Emma@Emmas-MBP-3 publisher-website $ jekyll serve
  Configuration file: /Users/Emma/repos/publisher-website/_config.yml
  Configuration file: /Users/Emma/repos/publisher-website/_config.yml
              Source: /Users/Emma/repos/publisher-website
        Destination: /Users/Emma/repos/publisher-website/_site
  Incremental build: disabled. Enable with --incremental
        Generating... done in 0.049 seconds.
  Auto-regeneration: enabled for '/Users/Emma/repos/publisher-website'
  Configuration file: /Users/Emma/repos/publisher-website/_config.yml
      Server address: http://127.0.0.1:4000/
    Server running... press ctrl-c to stop.
Troubleshoot
- If the server “hangs” at “Generating…”, press
ctrl+cand re-run the command asjekyll serve --traceto see what the error is.- Try
bundle exec jekyll serveif you get a gem-version-related error
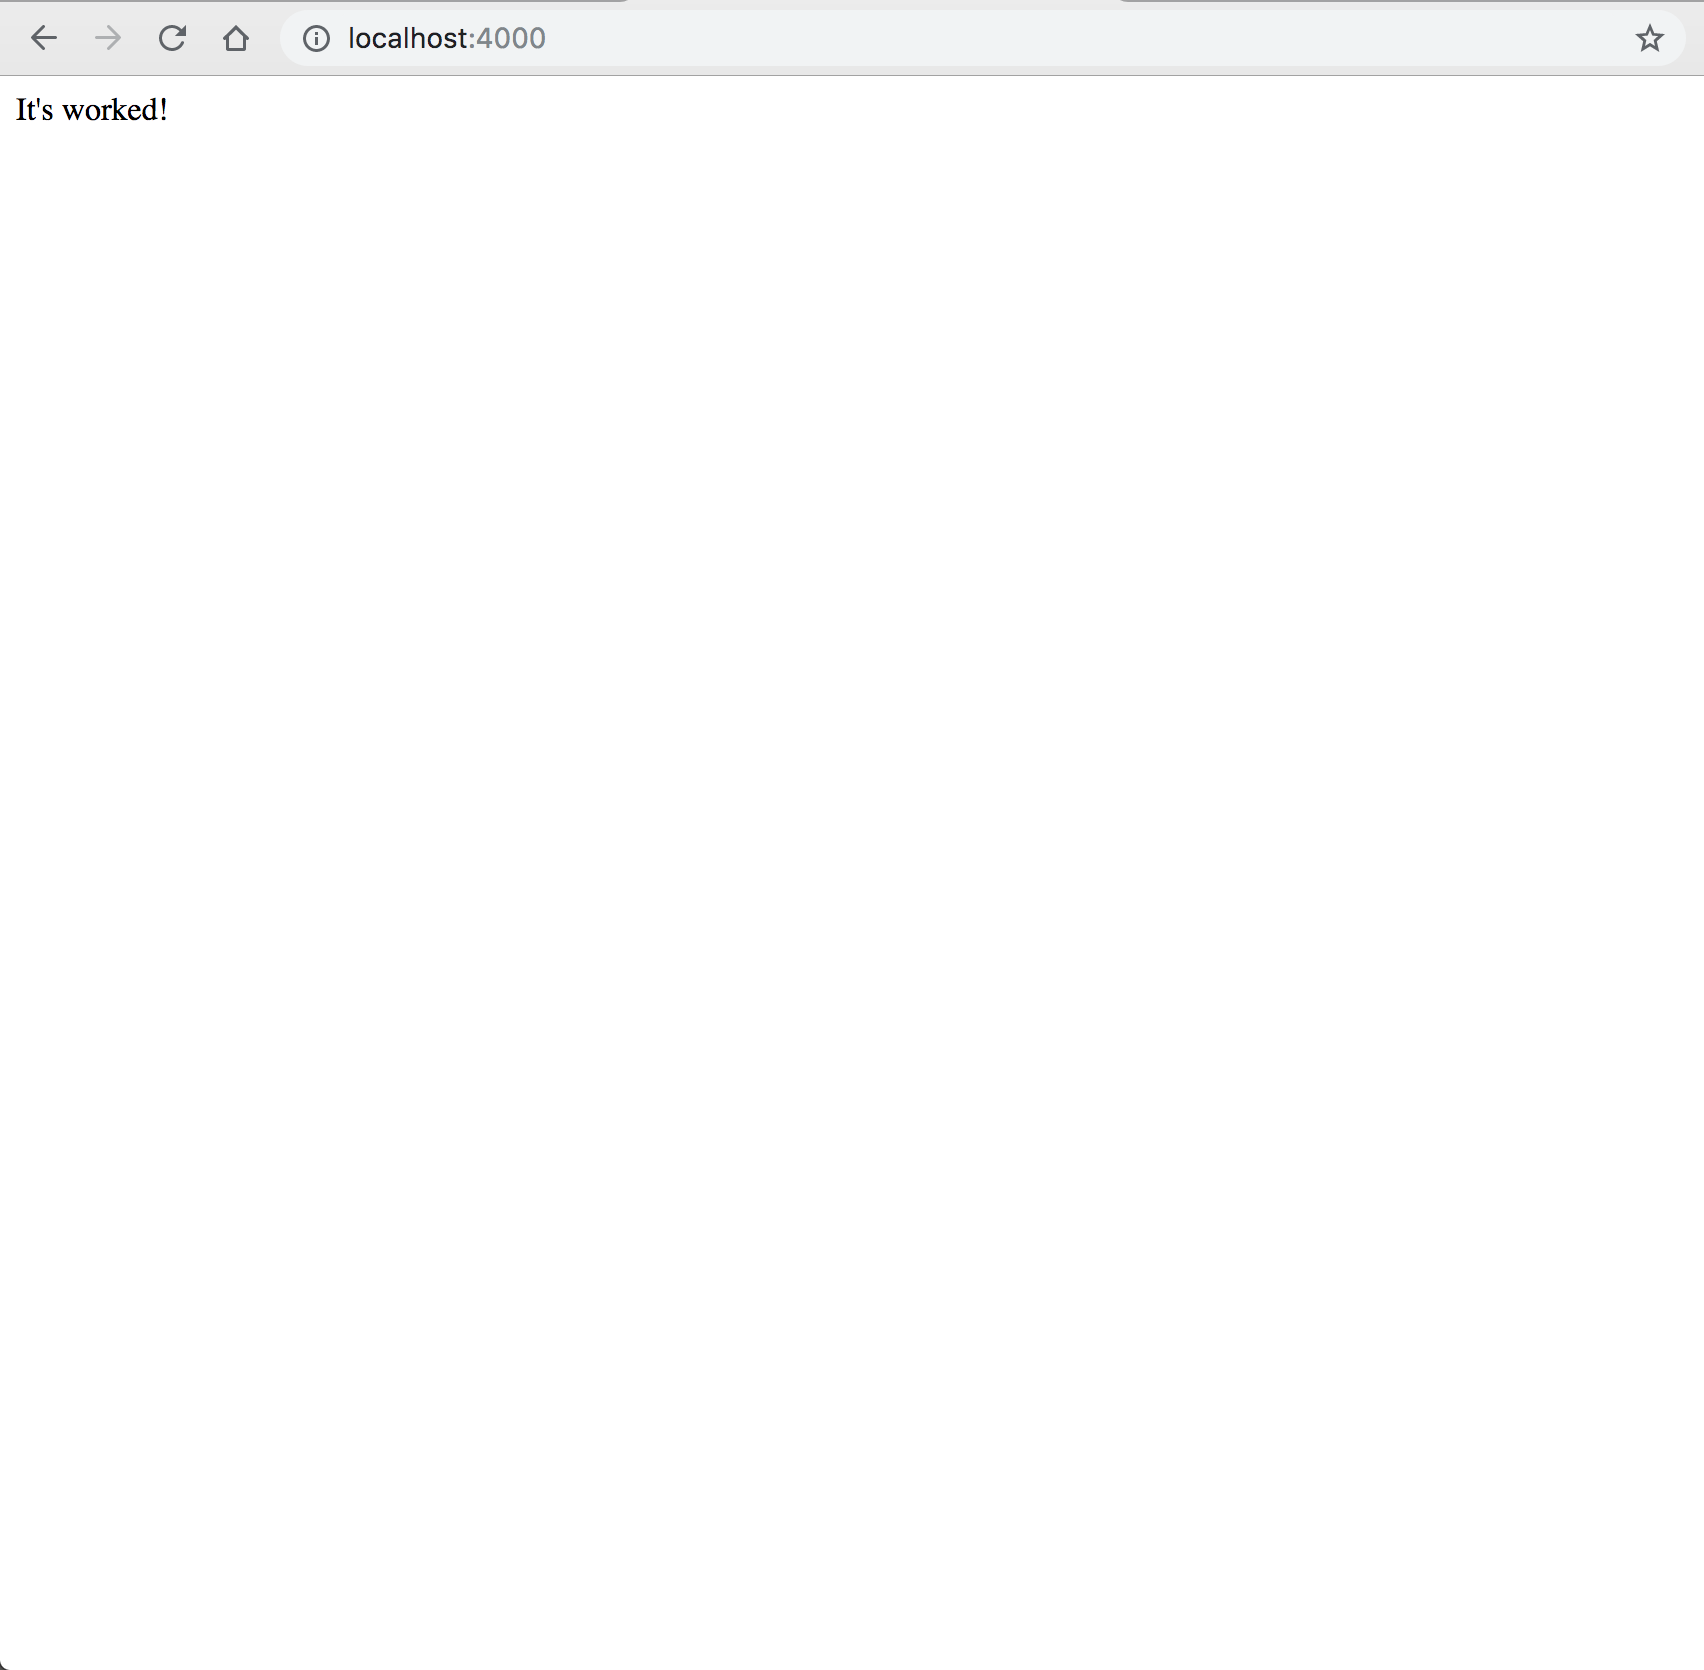
View the code running in a browser
See the bit in the terminal log that says Server address: http://127.0.0.1:4000/? That’s telling you the address of the website that’s now running on your computer. In a browser window, such as Chrome, type “http://127.0.0.1:4000/” in as the website address. This gives you access to this website that’s now running on your own computer, as opposed to on the internet. You can alternatively type in “localhost:4000” which is a synonym, and easier to type. Your browser window looks a bit like this:
View the code in your editor
Open your text editor application (e.g. Atom), click File > Open and navigate to the repos folder. Open the publisher-website folder itself in your text editor. Notice that the contents of the folder are listed on the left-hand side in the same way as you see lists of files in Finder or File Explorer. It will look something like this:
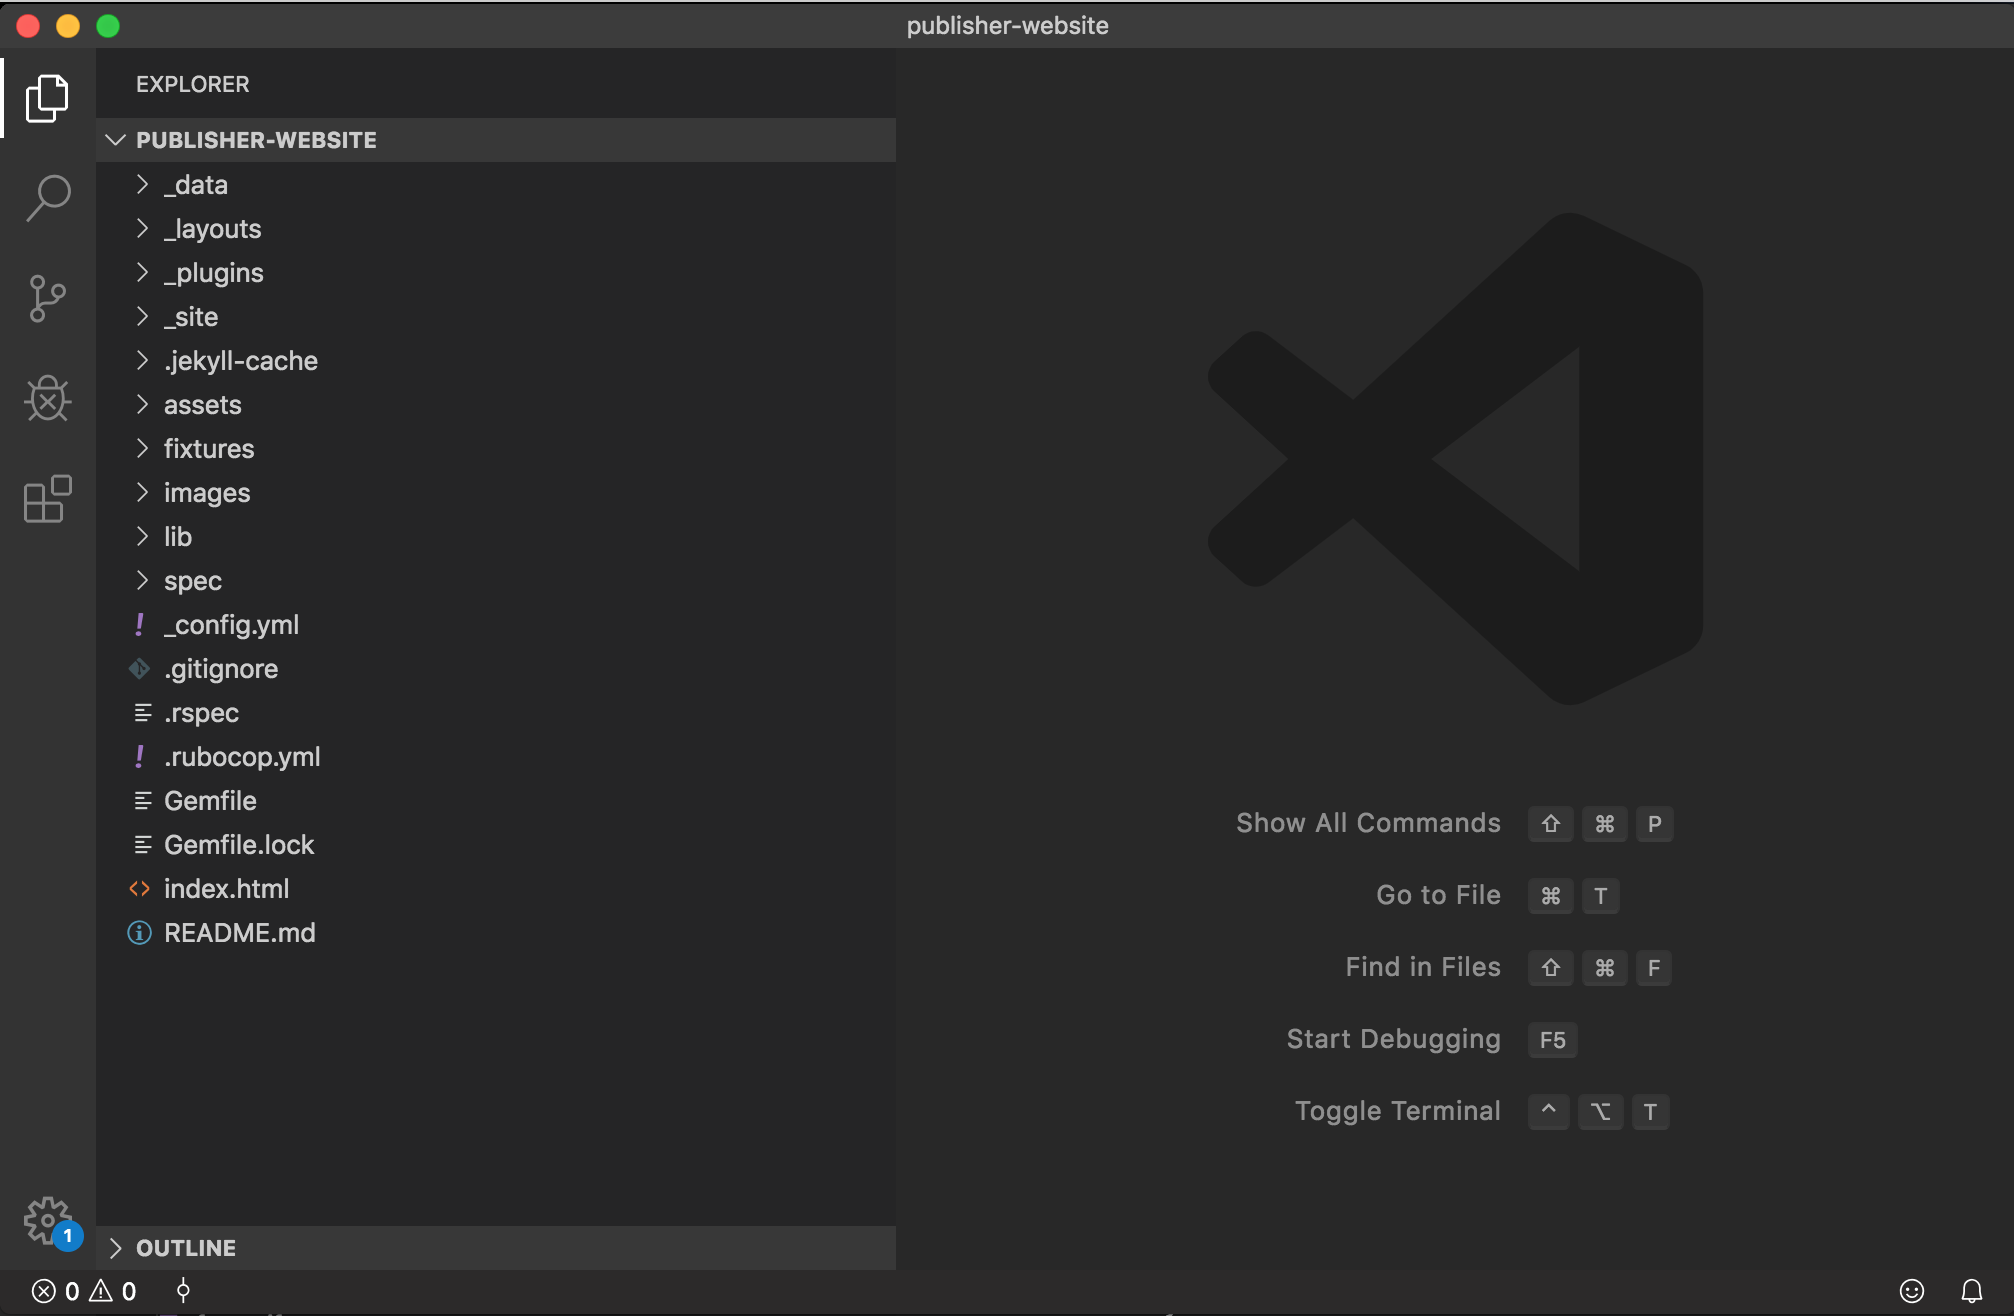
Compare that to the listing in Finder or File Explorer. It’s the same thing: a list of files and folders.

Double click on index.html to open it in your text editor. It looks a bit like this:
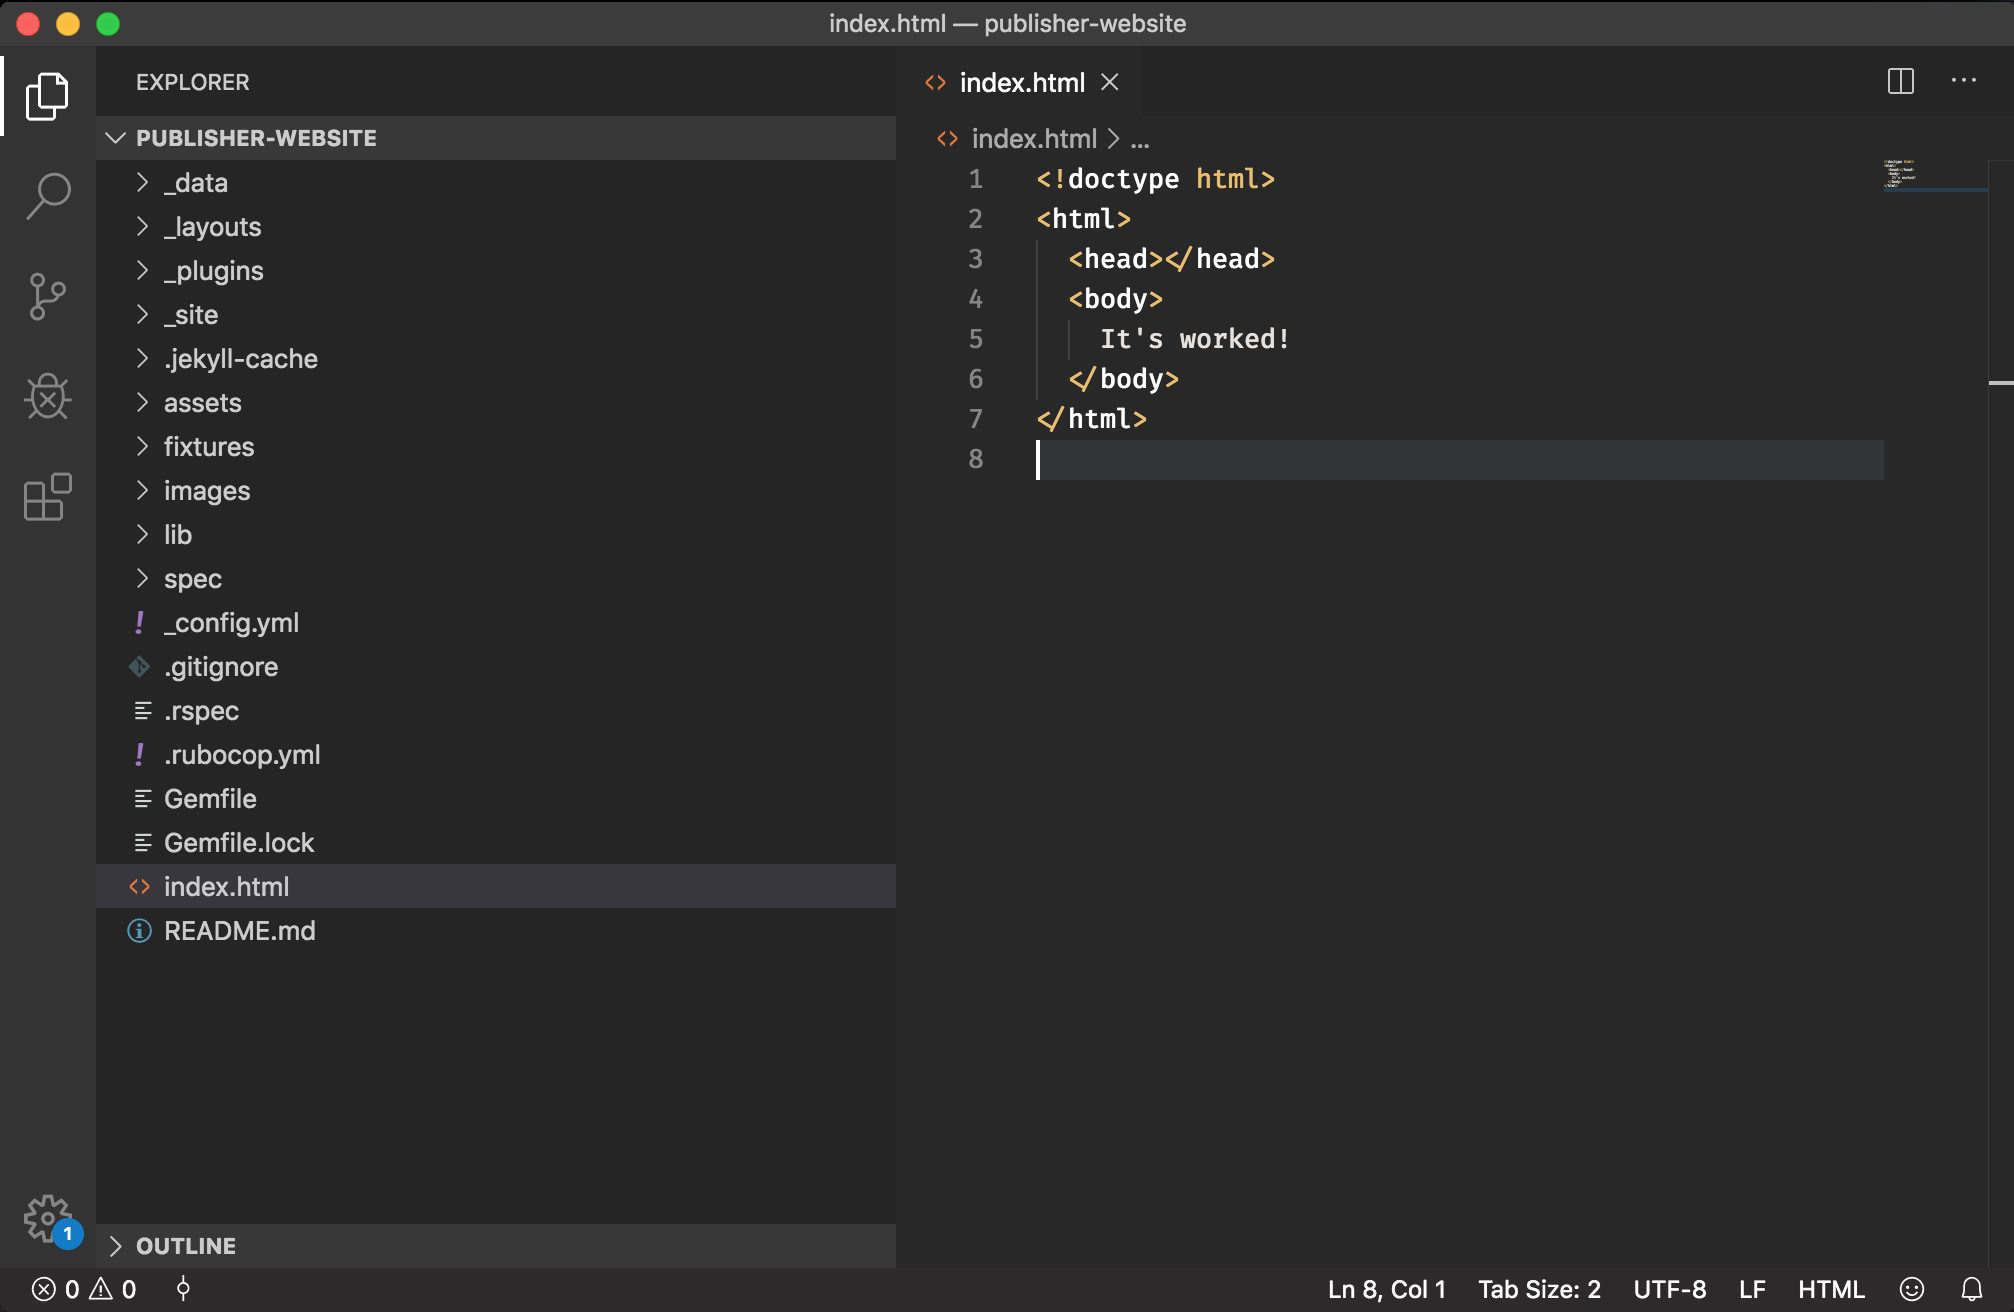
Notice that the words “it’s worked” appear in the file. This is the HTML file that you viewed in your browser.
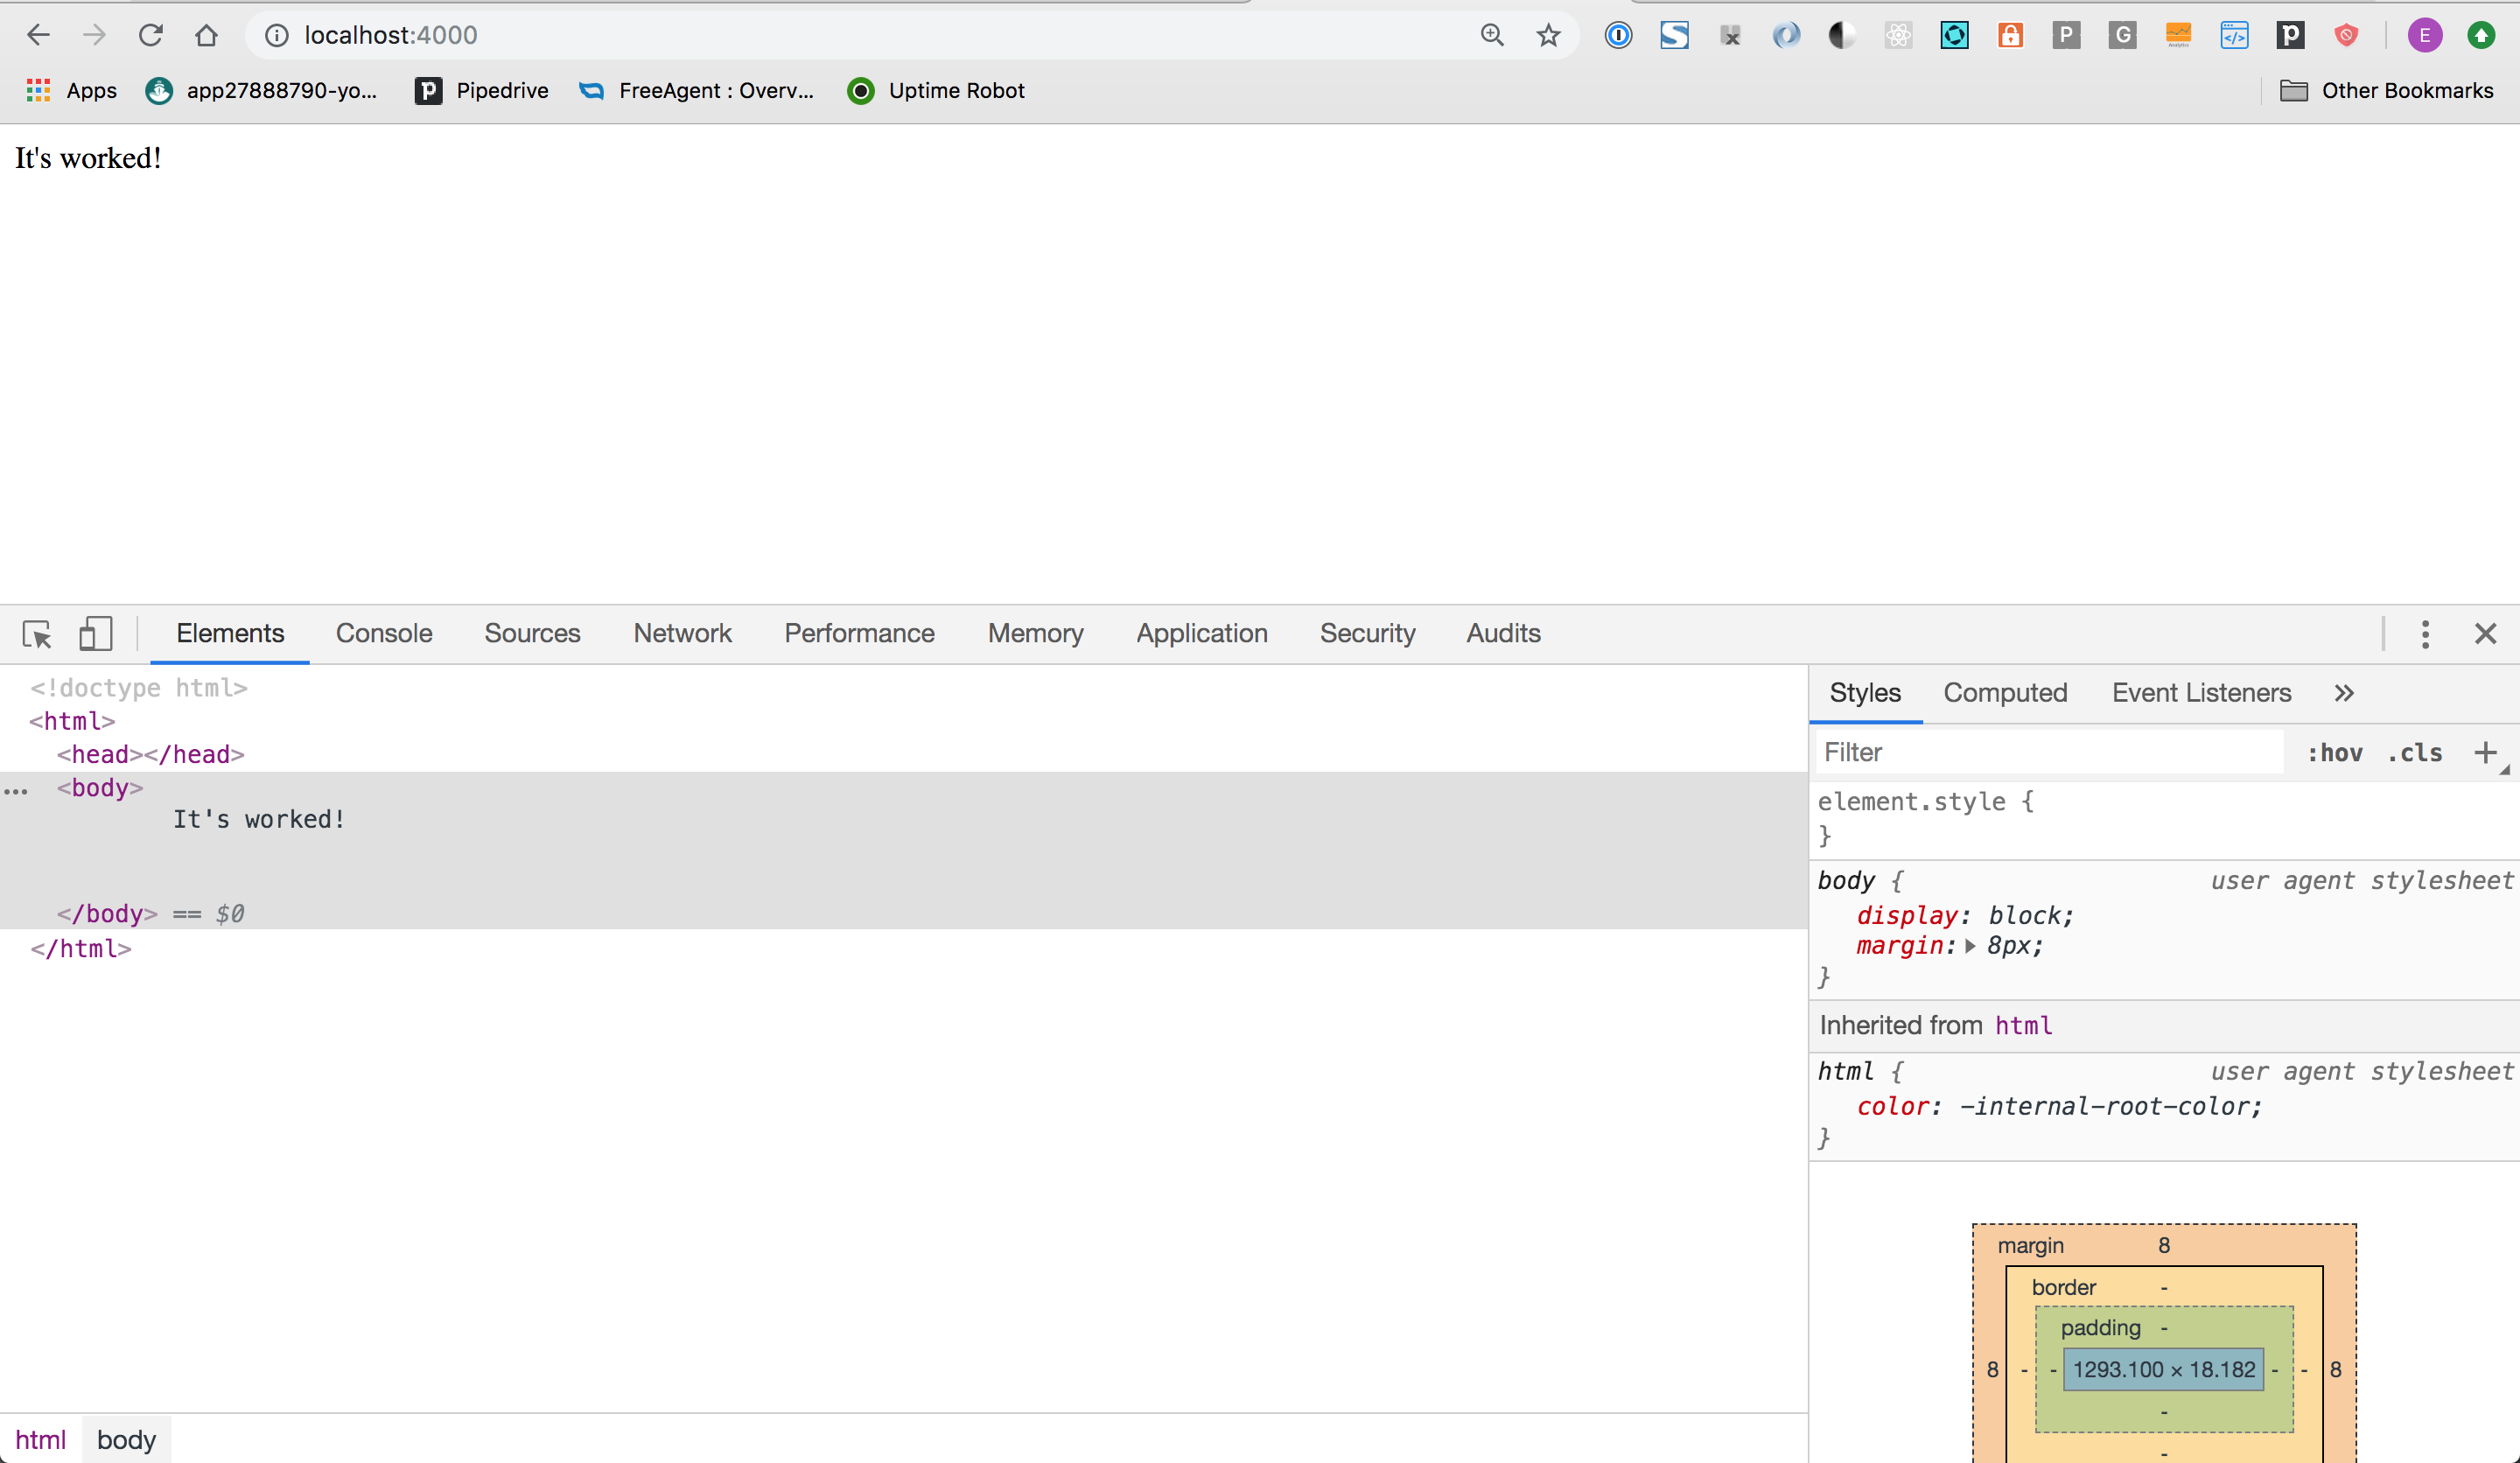
The brower has interpreted and displayed your HTML file. To prove it, return to your browser, right-mouse-click over the words “It’s worked”, and choose Inspect. You see the HTML of the page:
What you’ve learned
A lot!
- How to navigate around your computer on the command line
- How to install Ruby gems on your computer
- How to run a server on your computer and see the results in a browser
Next, you’re going to be guided through the process today to turn this skeleton of files into a website.